Project 4 – SW tube receiver
Update – 22.05.2010
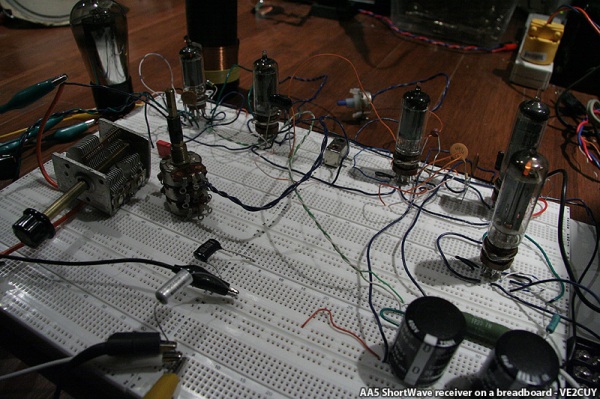
I did a little work on the project:
Replaced 10.7 “IF” cans by 455kc ones.
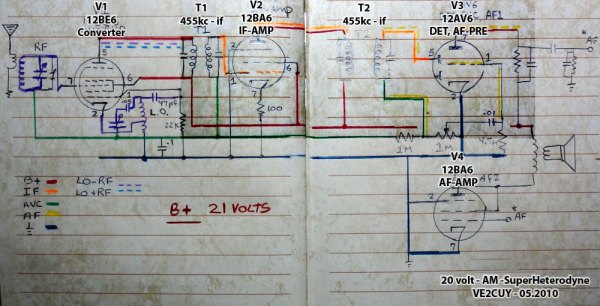
Selected all 12 volt filament tubes: 12BE6 (converter), 12BA6 (IF), 12AV6 (DET, AVC, AF-PRE) and 12BA6 (AF-AMP).
Fixed B+ at 20 volt (-12 + 12 from an ATX-Power supply). Current is around 4ma (yep!).
Heaters current = 650ma.
I am starting to get results from it!
.
Schematic – version 1
Next steps:
– add rf amp stage
– add a third “IF” stage (done)
– add a magic eye tube on the AVC signal (done – but wont make it to the final version)
– add a regeneration stage on V2 (not shure any more …)
Update – 28.05.2010
With the initial concept, I was thinking of a 50C5 35W4 12BE6 12AU6 12AV6 alignment with 10.7 IF.
Finally, I decided that it was too usual and I did not want it to be 117volts live.
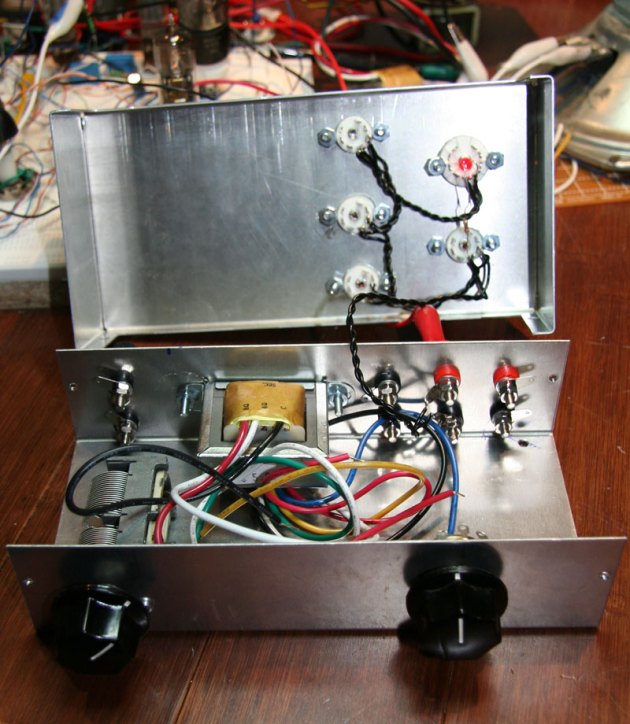
So, the actual state of the project is:
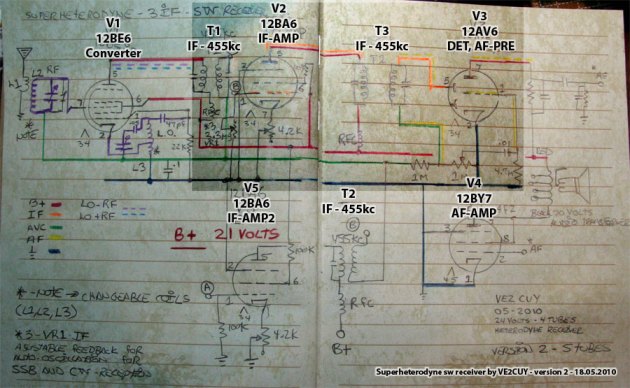
Tubes: 12BE6 (converter), 12BA6 (IF1), 12BA6 (IF2), 12AV6 (DET) and 12BY7 (AF-AMP – It as a better sound than a 12BA6),
2 x IF stages,
3 x 455kc transformers used in transistor radios,
Controlled auto-Oscillation of the first IF-AMP (BFO) for SSB and CW reception,
Interchangeable L1, L2 and L3 for multiband,
Very low (24volts – from an ATX power supply: +12 + -12) B+. I did some tests with 12volts and it works very well with headphones.
I will add a frequency counter on the converter tube (LO – IF) to display the reception frequency using a 74HC161 and an Arduino board to drive Nixie tubes or a LCD display.
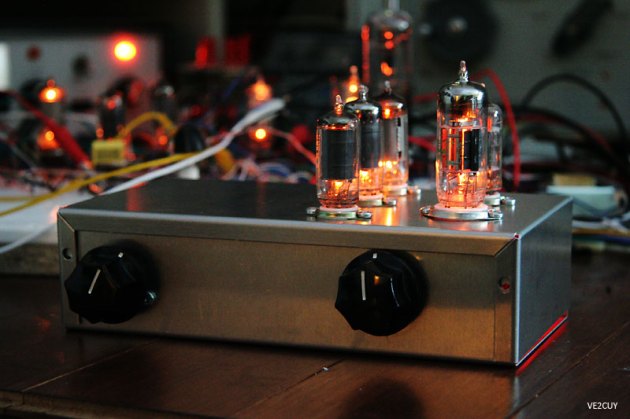
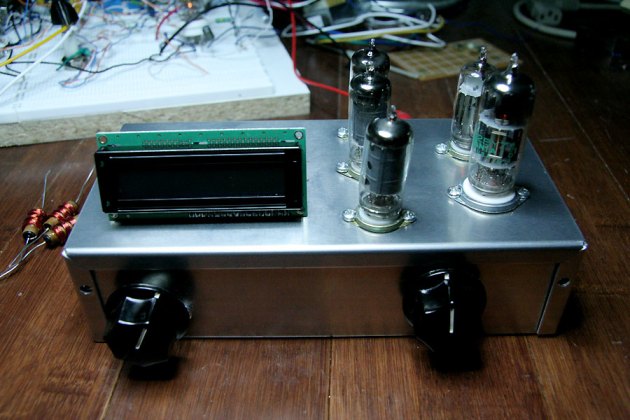
Looking at the following picture, I understand why I love those tube radio projects; they are so great in the dark…
Nixie or LCD ? …
Schematic – version 2
Update 20.06.2010
I’ve made some progress on my 5 tubes shortwave radio.
The frequency counter prototype is working.
I’m using a MPF102 as an RF amp, then the signal is feed in a 74HC161 (16x prescaler) and finally into an atmega328p for counting.
See the frequency counter at work:
=====================
Source code:
=====================
/*
Project: Frequency counter for the 5 tubes (3 IF) homemade shortwave receiver
By: VE2CUY – Alain Boudreault
Date: June 2010
*/#include <FreqCounter.h>
#include <LiquidCrystal.h>
#include <stdio.h>
#include <string.h>//#define __debug
// initialize the library with the numbers of the interface pins
LiquidCrystal lcd(12, 11, 3, 2, 1, 0);// Read fz input via Atmega328 pin 11 (arduino digital 5)
void setup() {
lcd.begin(16, 2);
lcd.print(« L.O. frequency »);
#ifdef __debug
Serial.begin(57600); // connect to the serial port
Serial.println(« Test fz counter »);
#endif
lcd.clear();
delay(500);
}long int frq;
void aff_number(long int number){
long int divider = 100000;
long int reminder;
int digit;
for (int i=0;i<6;i++){
reminder = number % divider;
digit = (number – reminder) / divider;
#ifdef __debug
Serial.print(digit);
#endif
lcd.print(digit, DEC);
if ( i == 1 || i == 4) { // format -> 00.000.0
#ifdef __debug
Serial.print(« . »);
#endif
lcd.print(« . »);
}
number=reminder;
divider/=10;
} // for i
#ifdef __debug
Serial.println( » MHz »);
#endif
lcd.print( » MHz « );
} // void aff_number
void loop() {
FreqCounter::f_comp=1;
FreqCounter::start(10);while (FreqCounter::f_ready == 0){
frq=FreqCounter::f_freq;
}
lcd.setCursor(0, 0);
lcd.print(« LO: »);
frq*=16; // Adjust for prescaler
frq+=90; //frequency fine tuning
aff_number(frq);
lcd.setCursor(0, 1);
lcd.print(« FZ: »);
aff_number(frq-4550); //IF = 455KC
}


Ping : Home page « ve2cuy
Ping : Hold on to that pile of gold « ve2cuy
Ping : Someday … « ve2cuy
Very nice tube radio project, love the magic eye, always wondered how they worked.
Would you mind posting a schematic showing how you used the MPF102 RF and 74HC161 prescaler to connect to the arduino. My interest would be to measure regenerative radio receiver that operate from 88MHZ up to the airband frequency. Thanks for the projects, keep up the great work.
David S
Excellent looking project, nice job and sounds good too.
Love the magic eye tuning always wondered how they work.
Was wondering if you would mind sharing the schematic of the setup you used, RF amp, and prescaler to measure frequency. I have an Arduino that I would somehow like to use to measure frequency on some regenerative solid state/tube receivers.
Again great job, nice chassis your using.
Thanks
Dave S
Very intreresting blog. It was very useful. I was searching exaxtly for this. Thank you for your effort. I hope you will write more such useful posts.
Hi … amazing! That’s what I was looking for! But … on top of many, the following question: what’s the anode voltage on the tuning eye? Could you send a video showing the performance on ssb and cw? 73, Cris, IZ3CQI